
GitHub Copilot in Eclipse: Installation, Setup, and Usage for ABAP Developers
This guide walks ABAP developers through installing, configuring, and using GitHub Copilot in Eclipse IDE with ABAP Development Tools (ADT).
Table of Contents
- Purpose
- Audience
- Prerequisites
- Install GitHub Copilot Plugin
- Sign In
- First Steps: Using Copilot Chat
- Prompt Best Practices
Purpose
This guide is designed for ABAP developers who are taking their first steps with AI-assisted development. It covers installation, authentication, and first usage of GitHub Copilot inside Eclipse.
By the end of this guide you will:
- Have the GitHub Copilot plugin installed in Eclipse
- Be signed in with your MSG GitHub account (Business or Enterprise)
- Know how to open Copilot Chat and use Ask mode to explore ABAP code
Audience
ABAP developers who want to start using GitHub Copilot in their daily workflow. This guide assumes you are comfortable writing ABAP code and navigating Eclipse/ADT — no prior experience with GitHub Copilot or AI assistants is needed.
Prerequisites
- An active GitHub Copilot license (Business or Enterprise).
- Zscaler configured for Eclipse. If Install New Software or Eclipse Marketplace fails, open the Zscaler configuration folder, then check the PDF User Guide Zscaler (chapters 3.2.2 Node.js and 3.2.6 Eclipse).
- Eclipse IDE with ADT installed — for setup, refer to Set up Eclipse IDE with ABAP Development Tools.
Install GitHub Copilot Plugin
- Open Eclipse → Help → Eclipse Marketplace
- Search for "GitHub Copilot"
- Click Install on the official GitHub Copilot plugin
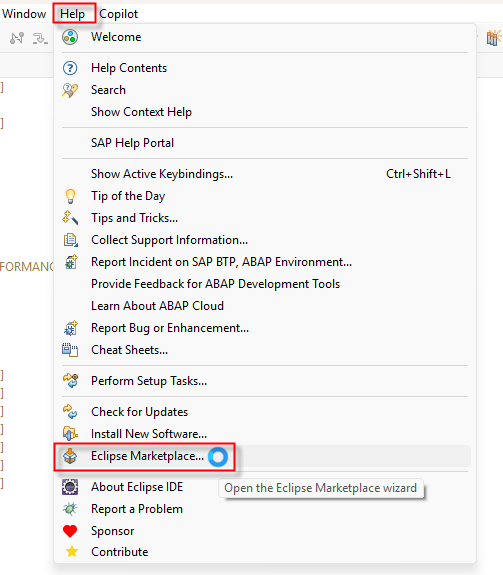
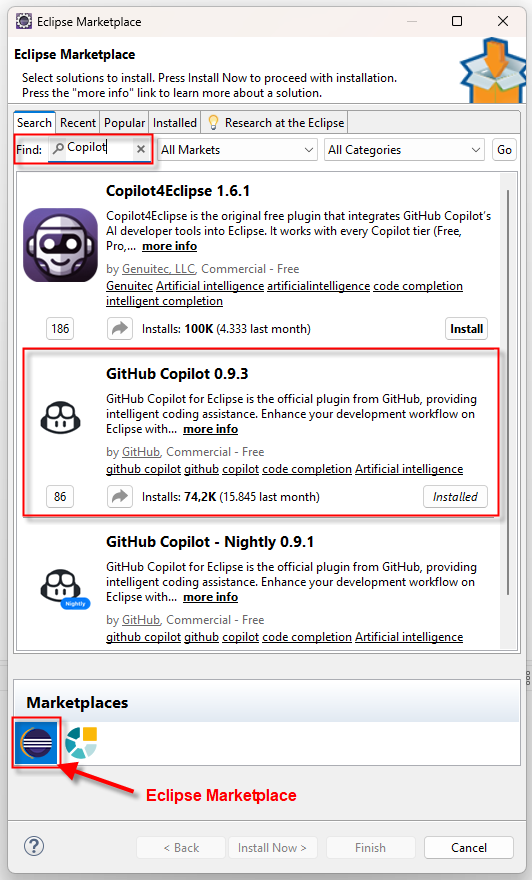
After installation, restart Eclipse when prompted.
Sign In
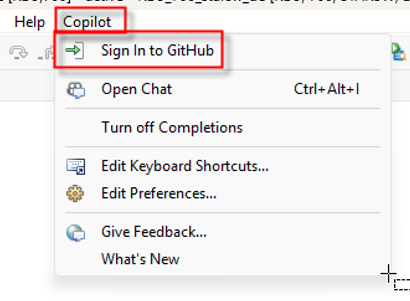
Once the plugin is installed, a new Copilot menu item appears in Eclipse.
- Go to Copilot → Sign in to GitHub
- A popup appears with a one-time device code — click Copy Code and Open
- A browser window opens to GitHub login. The code is in your clipboard.
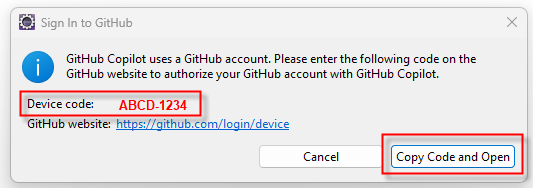
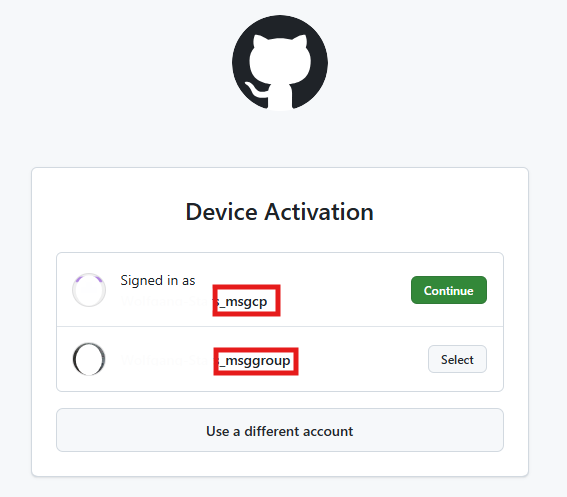
Select the GitHub account linked to your Copilot license:
| License Version | Account Suffix | Notes |
|---|---|---|
| Business (standalone) | Firstname-Lastname_msgcp | Requires initial SSO login (see below) |
| Enterprise | Firstname-Lastname_msggroup | More premium request tokens per month (1000 vs 300) |
Switching between Copilot variants
For Business version users: You must log in at least once via the SSO link before the *_msgcp account becomes visible.
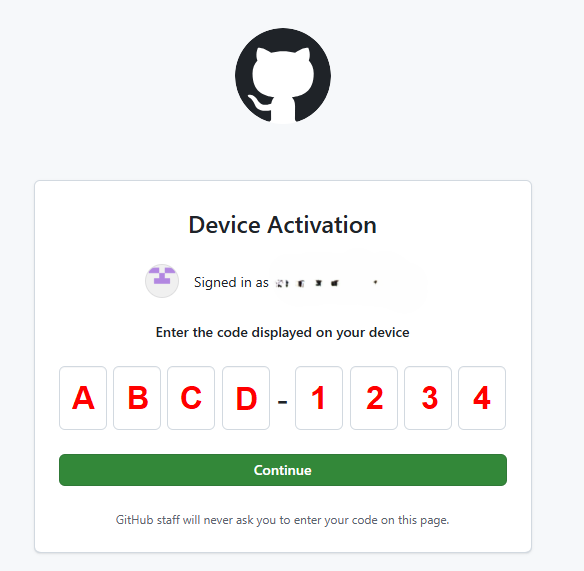
- Paste the device code (Ctrl+V) in the GitHub dialog
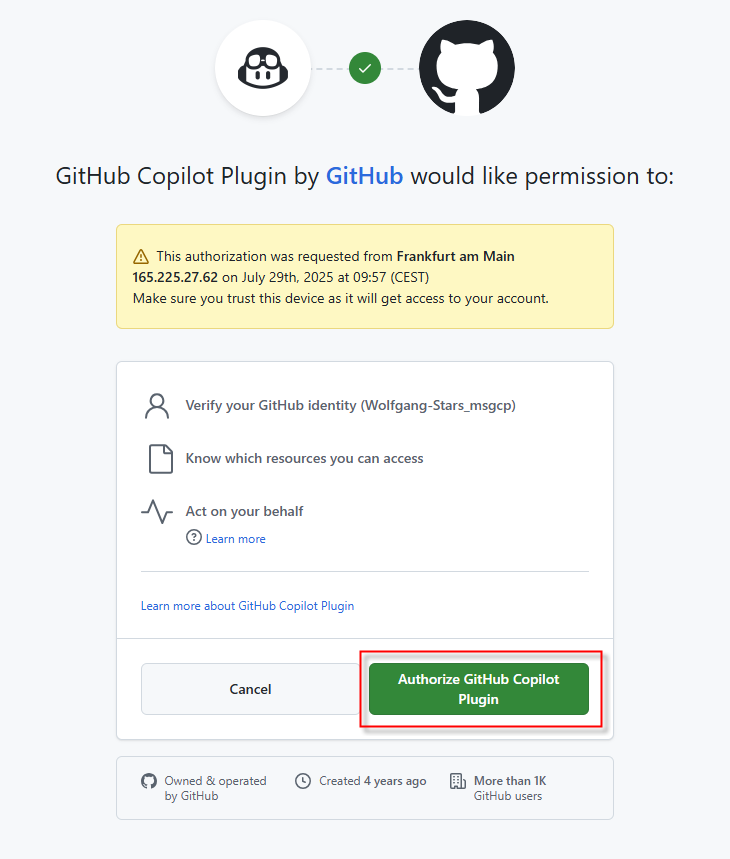
- Authorize the GitHub Copilot plugin
First Steps: Using Copilot Chat
TIP
In Eclipse with ADT, the file currently open in the editor is added to Copilot Chat automatically. If you need context from multiple files, attach them manually at the start of the conversation using the attach button in the chat panel.
Ask Mode — "Explain this code"
Goal: Learn to use Ask mode to understand existing code.
Steps:
- Open Copilot Chat via Copilot → Open Chat
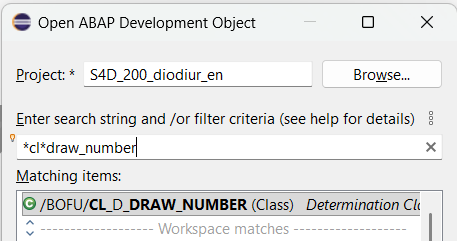
- Open a Z* class in ADT — double-click from the Project Explorer, or use
Ctrl+Shift+Ato search by object name. The opened file is automatically added to the chat context.
- You can enrich the context by opening additional ABAP objects in the editor (e.g. related classes, interfaces, or data dictionary objects). Once open, they can be attached via the attach button in the chat panel — useful when Copilot needs to understand dependencies or cross-class relationships.
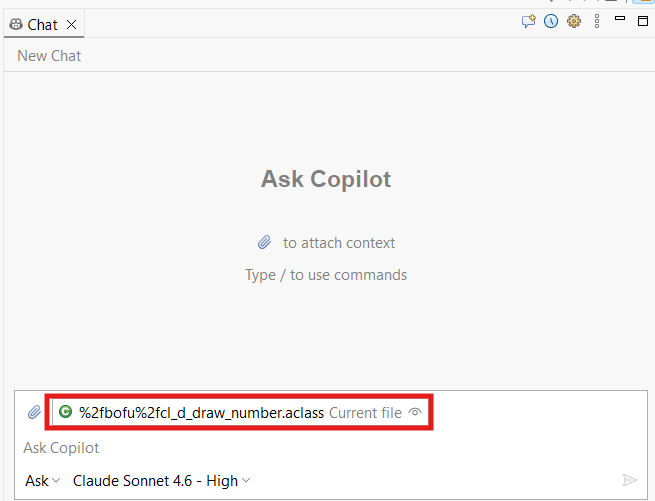
- In the chat, select Ask mode and choose your preferred model. See the configuration guide for available models and recommendations.
- In the chat input, type
/Explainfollowed by your prompt, then send.
Prompt to use:
Explain this ABAP class to me as if I'm new to the project.

- What is its responsibility?
- Which public methods are the entry points and what do they do?
- What SAP APIs or standard classes does it use?
- Are there any patterns or conventions I should follow when extending it?- (Optional) If you only need to understand a specific method rather than the whole class, replace the prompt in step 5 with:
/Explain the <method_name> methodCopilot will scope its explanation to that method only.
Prompt Best Practices
For more detailed guidance on prompting and advanced Copilot features, see the Copilot Configuration Guide.